Raspberry PI as temperature and humidity logger


Adding a simple sensor and few lines of code can turn your Raspberry PI into a logger and monitor for temperature and humidity.
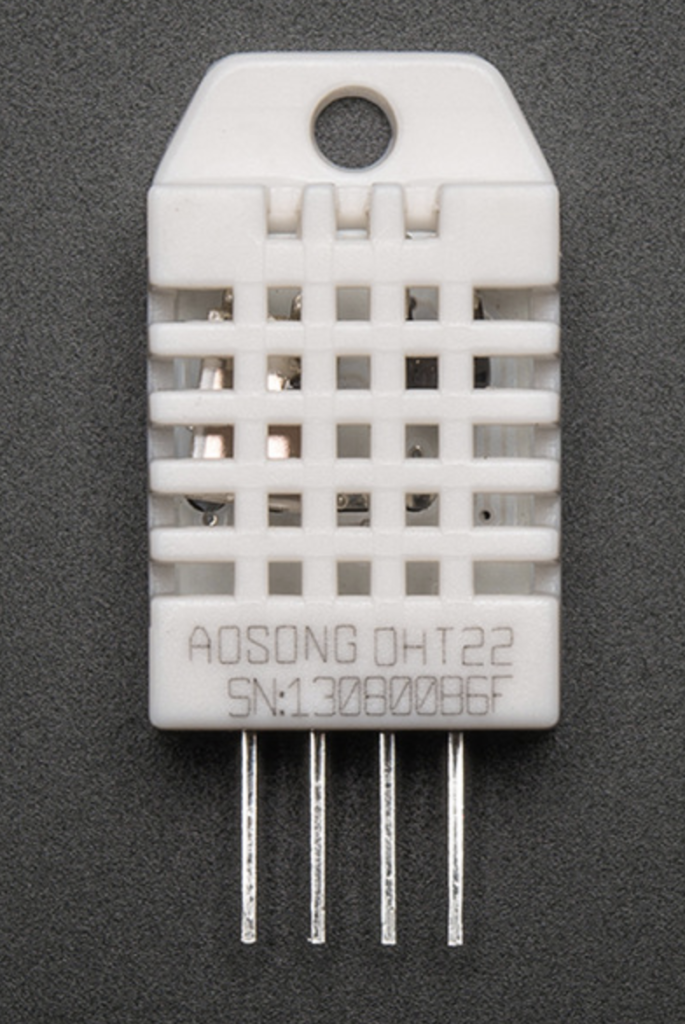
The sensor used for this project is DTH22 (https://www.adafruit.com/product/385) which can be purchased with the required resistor already attached in a small circuit and connector cables for Raspberry PI’s GPIOs from Amazon.
Once your Raspberry PI’s OS is installed and you have it up and running (hint: do the minimal install without the GUI), you need to attach the VCC pin (first on the left when looking at the DTH22 from the front – this should be soldered with the resistor supplied to the data pin immediately to its left, if you didn’t buy one already done) to one of the 5V power GPIO. The ground pin (far right) connects to one of the ground GPIO. The data pin can be connected to one of the data GPIOs. I connected it to GPIO 7 – known as GPIO 4 for data (useful to know for the code)

All the code below is supposed to run in the home folder of a root user or a sudoer. If there is no other use of this PI or if you are happy to use the default user ‘pi’ you can do this in the home folder of ‘pi’. This is what I did.
Getting Python ready
Python 2 is normally installed on the raspberry but you need Python3 (latest one – I used 3.7) as well as ‘pip’ for both versions.
cd ~
sudo apt-get install python3.7
sudo apt-get install python-pip
sudo apt-get install python3-setuptools
sudo python3.7 -m pip install pip
Driver Install
The first step is to install the DTH driver for both Python version 2 and Python 3 to have it registered in the kernel and use.
cd ~
git clone https://github.com/adafruit/Adafruit_Python_DHT.git
cd Adafruit_Python_DHT/
sudo python setup.py install
sudo python3 setup.py install
Test the sensor
Create this quick short python script and test it to see if the sensor is working.
#!/usr/bin/python
import sys
import Adafruit_DHT

sensor = Adafruit_DHT.DHT22
#make sure the sensor PIN corresponds to the one you used on GPIO
pin = 4
humidity, temperature = Adafruit_DHT.read_retry(sensor, pin)

if humidity is not None and temperature is not None:
    print('Temp={0:0.1f}*C  Humidity={1:0.1f}%'.format(temperature, humidity))
else:
    print('Failed to get reading. Try again!')
when you run the above code with
sudo ./test.py
you should get a command line output of the temperature and humidity from the sensor. If all is good, we are set to create the scripts we need. In my case, I created one for displaying the readings from the sensor on a small footprint web server using a fancy gauge, one for sending an email alert if the temperature goes above a certain limit (you can do this for humidity too) and one to simply log the readings as a record in a file that can be opened as CSV when needed.
Displaying sensor output on a web page with fancy gauges
We will install and use ‘flask’ to run the website and neat code from ‘justgage’ to display the nice coloured gauges. Note the directories static and templates are used to keep the JS from ‘justgage’ and the ‘html’ file separate. The location to load the JS inside the html can be changed if you wish.
This took some time to get right so important notes for you are below:
- You can create a folder in the home folder to keep the files for holding the files to run this website.
- Python code sits in main.py, the HTML file that is called from the main.py sits in the <templates> and the two files (justgage.js and raphael-2.1.4.min.js) from justgage needed by the HTML to create fancy gauges are needed in the <scripts> folder.
- Edit the HTML for CSS styles and other stuff you want to include
- The two lines below are used by ‘flask’ to get the javascript via html and their path is important – it is relevant to the location of main.py and not the HTML.
- <script src=”/static/raphael-2.1.4.min.js”></script>
- <script src=”/static/justgage.js”></script>
cd ~
sudo mkdir web
sudo pip install flask
sudo wget https://toorshia.github.io/justgage/download/justgage-1.2.2.zip
sudo unzip justgage-1.2.2.zip
cd web
sudo mkdir static
sudo mkdir templates
sudo sudo cp ../justgage-1.2.2/*.js static/
sudo touch main.py
sudo chmod +x main.py
cd templates
sudo touch main.html
main.py
#!/usr/bin/python
from flask import Flask, render_template
import sys
import Adafruit_DHT
app = Flask(__name__)
sensor = Adafruit_DHT.DHT22
pin = 4

@app.route("/")
def main():
    humidity, temperature = Adafruit_DHT.read_retry(sensor, pin)
    templateData = {
            'temperature' : round(temperature, 1),
            'humidity' : round(humidity)
    }
    return render_template('main.html', **templateData)

if __name__ == "__main__":
    app.run(host='0.0.0.0', port=80, debug=True)
main.html
<!doctype html>
<html>

<head>
  <meta http-equiv="refresh" content="60">
  <meta charset="utf-8" />
  <title>Raspi Weather Station</title>
  <meta name="viewport" content="width=device-width">
  <style>

    body {
    text-align: center;
    padding: 0px;
    margin: 0px;
    background-color: #f0f0f2;
    font-family: -apple-system, system-ui, BlinkMacSystemFont, "Segoe UI", "Open Sans", "Helvetica Neue", Helvetica, Arial, sans-serif;
    }


   .container {
    width: 600px;
    margin: 100px auto;
    text-align: center;
  }

  .gauge {
    width: 250px;
    height: 250px;
    display: inline-block;
  }

  </style>
</head>

<body>

	<h1> Raspi Weather Station </h1>

	<h3> Temperature = {{ temperature }} °C </h3>
	<h3> Humidity = {{ humidity }} % </h3>

  <div class="container">
    <div id="gg1" class="gauge"></div>
    <div id="gg2" class="gauge"></div>
  </div>
  <script src="/static/raphael-2.1.4.min.js"></script>
  <script src="/static/justgage.js"></script>
  <script>

  document.addEventListener("DOMContentLoaded", function(event) {

    var dflt = {
      min: 0,
      max: 200,
      donut: true,
      gaugeWidthScale: 0.6,
      counter: true,
      hideInnerShadow: true
    }

    var gg1 = new JustGage({
        id: 'gg1',
	value: {{temperature}},
      	title: 'Temperature',
	min: 0,
	max: 50,
    });

    var gg2 = new JustGage({
      	id: 'gg2',
	value: {{humidity}},
      	title: 'Humidity',
      	min: 0,
	max: 100,
    });

  });
  </script>
</body>

</html>
Now that it is all set, you should try to run the Python code and see if all is well.
sudo ./main.py
and output should be the lines to show that the flask web server starts up and is now serving. If you use another computer to test http://serverip you should see the result of your work and the command line on the server should show you the log attempt and its result.
To get this webserver running on startup, we can create a small shell script and put that in crontab. I placed my shell script in the home folder path. You will notice that crontab entry also logs all webserver attempts output to a log file. Very useful!
webserver.sh
#!/bin/sh
# launcher.sh
# navigate to home directory, then to this directory, then execute python script, then back home

cd /
cd home/pi/web
sudo python main.py
cd /
crontab entry
sudo crontab -e

@reboot sh /home/pi/webserver.sh >/var/log/cronlog 2>&1
Log reading from the sensor to a CSV
A simple Python script can be used to fetch the sensor data and append it to a CSV file. For this purpose, I created a CSV file with headers (Date,Time,Temperature,Humidity) already added.
Hint: You can add this code to the email alert to have it run at the same frequency as email alert via crontab.
The code snippet is as below:
#!/usr/bin/python
import sys
import csv
import time
import Adafruit_DHT
sensor = Adafruit_DHT.DHT22
pin = 4

humidity, temperature = Adafruit_DHT.read_retry(sensor,pin)

with open ('/home/pi/log.csv', 'a') as f:

    if humidity is not None and temperature is not None:
        row = [time.strftime('%m/%d/%y'), time.strftime('%H:%M:%S'),"{:.2f}".format(temperature),"{:.2f}".format(humidity)]
        w = csv.writer(f)
        w.writerow(row)
    else:
        print ('Failed to get reading. Try again!')

    f.close()
Email alert when the temperature (or humidity) goes above a set limit
This will use Python 3 and its smtplib library. The code below only works with GMail and for this to work, you will need to enable GMail to work with ‘less secure apps’ by toggling it on at this link https://myaccount.google.com/security or if Google has changed the link where this setting lives, then log in to your Google Account, go to Manage Account, look for Security and in the list you will find this option. If it’s been too late since this post was written, Google may have disabled this and you will have to look for another Python code or app to use for these email alerts.
It will be ideal to create a separate folder for this script to be kept – just for sanity sake!
sudo mkdir alerts
For the code below, I set the temperature to 35 for alert and filled in the details of Gmail account that will send the email and the email details that will be sent. You need to edit all those to suit your need.
alert.py
#!/usr/bin/python
import sys
import smtplib
import Adafruit_DHT
sensor = Adafruit_DHT.DHT22
pin = 4
humidity, temperature = Adafruit_DHT.read_retry(sensor,pin)
if (temperature > 35):
    print(temperature)

    smtpUser = "myaccount@gmail.com"
    smtpPass = "mypassword"
    toAdd = "receiver@emailaddress.com"
    fromAdd = "Alert!"

    subject = "Whatever Subject line you want for your email"
    header = "To: " + toAdd + "\n" + "From:" + fromAdd + "\n" + "Subject:" + subject
    body = ("Warning: Temperaure has exceeded {0:0.1f} C".format(temperature))


    print(header + "\n" + body)

    s = smtplib.SMTP("smtp.gmail.com", 587)

    s.ehlo()
    s.starttls()
    s.ehlo()

    s.login(smtpUser, smtpPass)
    s.sendmail(fromAdd, toAdd, header + "\n\n" + body)
    s.quit()
Now that the code is ready, you should test by running
sudo ./alert.py
and if the email is received, all is well and we can now make a shell script and add this little buddy to the crontab as well with a set frequency to run at. My code below is set to run every 5 minutes and again, writes the log to a file.
alert.sh
#!/bin/sh
# launcher.sh
# navigate to home directory, then to this directory, then execute python script, then back home

cd /
cd home/pi/alerts
sudo python3 alert.py
cd /
crontab entry
sudo crontab -e

*/5 * * * * sh /home/pi/alert.sh >/var/log/alert 2>&1